Table of Contents
- Why Metal Railings Matter for Basement Stairs
- Measuring for a Stair Handrail: The Foundation of Your Design
- UK Stair Handrail Regulations and Safety Standards
- Basement Stair Handrail Ideas: Styles and Materials
- Railing Placement and Anchoring Strategy
- Basement Stair Railing Maintenance and Durability
- Planning Your Installation: Timeline and Next Steps
- Frequently Asked Questions
Last Updated: October 16, 2026
Why Metal Railings Matter for Basement Stairs
Basement stairs are narrower, steeper and less well-lit than main staircases, so a fall can be serious.
Planning metal railings basement steps requires accurate measurement, an understanding of safety codes, and materials that withstand damp conditions. This guide covers the process from measurement to installation.
Measuring for a Stair Handrail: The Foundation of Your Design
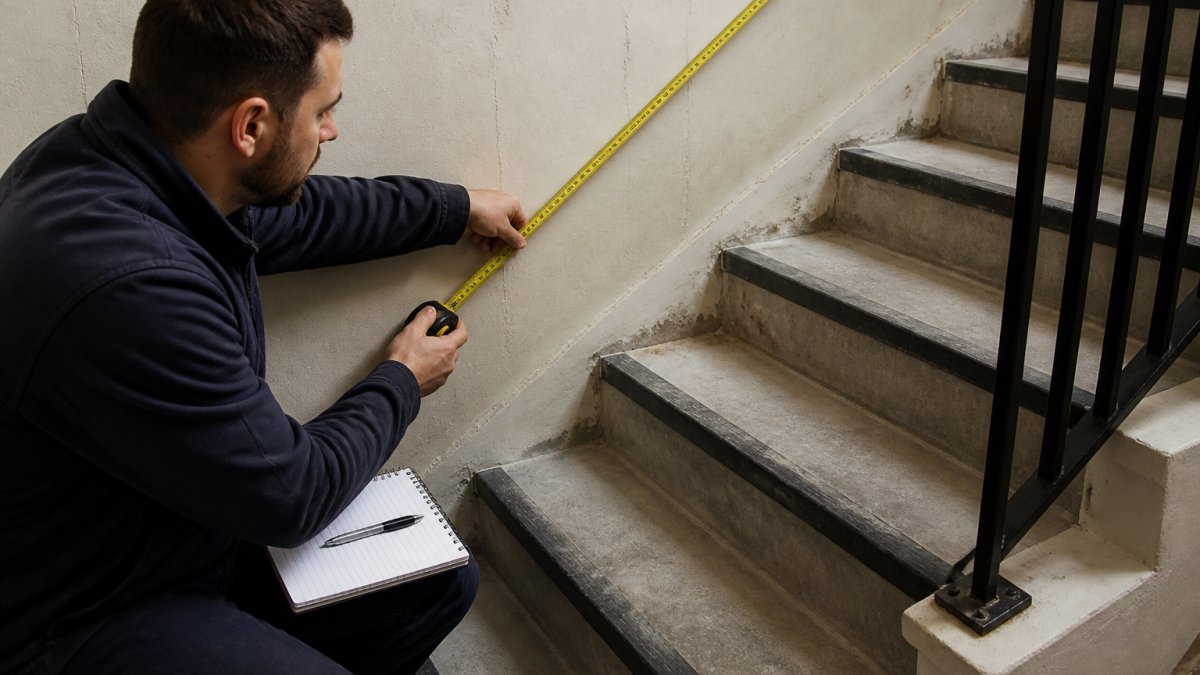
You cannot design or fabricate metal railings for basement steps without exact stair geometry, skipping or estimating this is where most DIY projects fail. Work through the survey in a fixed order, as each figure feeds the next.
Step 1: Establish the Overall Rise and Going
Start with the two figures that define the staircase:
- Total rise, the vertical distance from the finished floor at the bottom to the finished floor at the top, measured with a laser level or a straight edge and spirit level, not by adding up step heights.
- Total going, the horizontal distance from the front edge of the top nosing to the front edge of the bottom nosing.
Measure total rise in one go rather than summing individual steps, which compounds error on a steep basement flight.
Step 2: Record Individual Rise and Going
Now measure a representative sample of steps:
- Individual rise, floor-to-floor height divided by the number of risers. On older basement flights this varies, so measure the first, middle and last step separately.
- Individual going (tread depth), the horizontal distance from one nosing to the next, measured at the nosing line, not across the tread surface.
- Nosing projection, how far each nosing overhangs the riser below. This matters because handrail height is measured vertically from the nosing line.
If individual rises vary by more than a few millimetres, note it: a level railing will sit at different heights above each nosing, affecting comfort and compliance.
Step 3: Calculate the Pitch
The pitch is the angle of the flight and determines how your handrail is set out:
- Pitch = arctan(total rise ÷ total going).
- A typical domestic basement flight sits between roughly 30° and 42°. Steeper flights need a handrail that is easy to grip continuously.
- Record the pitch to the nearest degree; your fabricator uses it to set the handrail angle and bracket rake.
Step 4: Check Headroom and Clear Width
Two commonly missed measurements can kill a design:
- Headroom, measure vertically from the nosing line to the underside of any obstruction: ceiling, beam, pipe, duct or floor above. A handrail projecting into low headroom becomes a hazard.
- Clear width, measure between finished wall faces, or wall and obstruction, at the narrowest point. On basement stairs this is often tighter than it looks.
Under roughly 1000 mm clear width, a central rail is usually impractical, so plan for a single side rail; if wider, check the regulations first.
Step 5: Set Out the Nosing Line and Handrail Height
Handrail height is measured vertically from the nosing line, so establish that line first:
- Strike a chalk line or use a laser along the nosings from top to bottom.
- Mark the required handrail height above that line at the top, middle and bottom of the flight.
- Check the rail can be fixed at that height without clashing with the wall, a door swing, or a landing newel.
Because basement floors and walls are rarely true, take readings at multiple points, a wall bowing 15 mm over 3 m changes where brackets land.
Step 6: Survey the Fixing Surfaces
Before you finalise anything, record what you are fixing to:
- Wall construction, brick, block, concrete, stone or stud partition. Each needs a different fixing strategy.
- Stringer type, timber, steel or concrete, open or closed.
- Landing structure, what is available at the top and bottom to take a newel post or wall return.
Photograph every wall and landing, and note damp patches, which influence material choice and fixings.
Measure in millimetres throughout. UK Building Regulations and fabrication drawings both work in metric, and mixing units is one of the most common causes of a railing that does not fit.
UK Stair Handrail Regulations and Safety Standards
Building Regulations govern stair railings in the UK, and compliance is a legal requirement. Your metal railings basement steps must meet these standards or the property fails inspection.
Height and Spacing Requirements
Approved Document K specifies handrail height for stairs: between 900 mm and 1000 mm above the stair nosing (the front edge of each step).
The regulations also require railings to resist horizontal and vertical loads, a handrail must support a person’s weight if they slip.
Baluster Spacing and the 100 mm Sphere Rule
Baluster spacing is a key safety requirement: the vertical elements between handrail and bottom rail must be close enough that a 100 mm sphere cannot pass through any gap.
This rule prevents children from getting their heads stuck or falling through. In practice:
- Vertical balusters must be spaced no more than 100 mm apart
- Horizontal elements must also follow the 100 mm rule
- Gaps at the bottom of the railing (between the bottom rail and the floor or stairs) must also be no more than 100 mm
If you’re designing metal railings basement steps with a modern open style, the 100 mm sphere rule is non-negotiable.
Measure your baluster spacing in millimetres, not inches. UK Building Regulations use metric measurements. A spacing that looks good visually might violate the 100 mm rule, check the math before fabrication.
Basement Stair Handrail Ideas: Styles and Materials
Material and style affect durability, maintenance and appearance. Basements are damp, and what works upstairs may rust within months.
Material Selection for Basement Conditions
Powder coating adds a second layer of protection and allows colour choices.
Wrought iron offers a traditional aesthetic but rusts if not sealed, needing annual inspection and touch-ups in a damp basement.
For metal railings basement steps in most situations, we recommend galvanised mild steel with powder coating.
Design Styles: Traditional and Modern Approaches
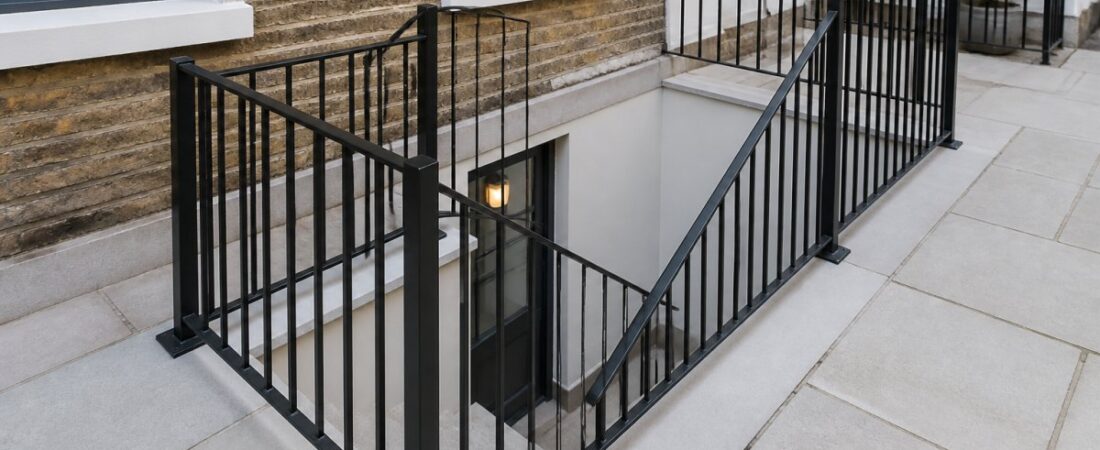
Modern styles suit contemporary basements: simple vertical balusters, sleek horizontal rails, minimalist or wall-integrated newel posts, and matte black or brushed stainless steel finishes.
Style depends on your basement’s architecture and your preference, but the safety requirements, handrail height, baluster spacing, structural strength, are the same regardless.
Railing Placement and Anchoring Strategy
Placement and securing determine whether the installation is safe and permanent. A railing fixed into plaster or a hollow partition will fail under load, a safety issue, not cosmetic.
Deciding Where the Railing Runs
Most basement stairs have a railing on at least one side, usually the open side. If both sides are enclosed, a wall-mounted handrail may suffice; if one side is open, a full railing is essential.
Set out the run before you think about fixings:
- The railing should begin at the top landing and continue to the bottom landing.
- At the bottom, extend the rail horizontally for at least the depth of one tread, or continue it to a newel, so there is no gap where a hand can slip off the end.
- At the top, the rail should terminate in a newel or return to the wall, not stop in mid-air.
Measure the clear width at the narrowest point. If it justifies a central rail, check the regulations first, as it changes the usable width on both sides.
A common mistake is starting the railing partway down the stairs or stopping it short of the bottom. This creates a tripping hazard and looks unfinished. Always extend your railing the full length of the stairs.
Finding Structural Backing
Before choosing a fixing, know what is behind the surface, the step most DIY guides skip, and the one that decides whether the railing stays put.
- Masonry walls (brick, block, concrete), generally reliable. Fix into the masonry itself, not plaster or render. Plaster can be 15-25 mm thick on older walls, so a fixing that only reaches the plaster has almost no pull-out strength.
- Timber stud partitions, locate the studs with a stud finder and confirm by drilling a small pilot. Fixing into plasterboard alone will not resist a horizontal load.
- Steel stringers, can take a bolted bracket, but you need to know the steel thickness and whether it is hollow section or plate. Drilling a hollow section in the wrong place can weaken it.
If you cannot identify sound structural backing at a fixing point, change the design: add a newel post, run the rail to a different wall, or introduce a floor-mounted post at the landing.
Choosing Fixings by Substrate
The fixing must match the substrate and the load:
- Concrete and dense block, mechanical or chemical resin anchors. Resin anchors are often preferred where the masonry is cracked or vibration is a concern.
- Brick, expansion anchors set into the brick body, not the mortar joint, which is weaker and can crumble.
- Timber, coach screws or through-bolts with washers. Through-bolting is stronger than screwing into the face grain.
All fixings should be corrosion-resistant. Stainless steel bolts and brackets prevent rust staining and last in damp basements; zinc-plated fixings are acceptable in dry conditions but degrade faster in a basement.
Bracket Design and Load Path
The bracket links the railing to the structure and must transfer horizontal and vertical loads:
- Horizontal load, a person leaning or falling against the rail. This is the load that pulls fixings out of the wall.
- Vertical load, a person leaning down on the rail or using it to pull themselves up. This is the load that can shear fixings or bend brackets.
A bracket that is too thin, too short or fixed with too few anchors will flex, and repeated flexing loosens fixings over time.
For basement stairs, brackets are typically fixed to the staircase stringers (the angled beams supporting the stairs), the basement walls using fixings appropriate to the substrate, and the landing structure at the top and bottom.
Where geometry is awkward, a fabricated bracket matched to the actual angle and offset is stronger and neater than a generic one, bespoke fabrication fits the wall, stringer and rail line together rather than forcing a standard part into place.
Testing and Sign-Off
Once installed, check the railing by hand before sign-off:
- Apply firm horizontal and vertical pressure at the top, middle and bottom of the run.
- Look for movement at the fixings, not just at the rail.
- Check that every fixing is tight and that no anchor has spun or stripped.
If anything moves, stop and address it before sign-off. A railing that passes a visual check but fails a load check is not finished.
Basement Stair Railing Maintenance and Durability
A well-designed railing lasts decades. A poorly maintained one deteriorates quickly, especially in basements.
Protecting Against Damp and Corrosion
Galvanised steel is tough but needs protection in very damp basements. Inspect twice yearly, in spring and autumn, for:
- White powdery deposits (zinc corrosion), normal and actually protective
- Red rust spots, the galvanising has been damaged
- Loose fixings or wobbling sections
If you spot red rust, clean it with a wire brush and apply rust-inhibiting paint before it spreads. Chipped or scratched powder coating exposes metal to rust, touch up small chips with matching paint; larger damage may need professional recoating.
Long-Term Care and Inspection
Every five years, have your railing professionally inspected, a qualified metalworker can spot early corrosion, structural issues, or loose fixings invisible to the untrained eye.
Keep your basement dry: improve drainage if water pools near the stairs and use a dehumidifier if moisture persists.
For stainless steel railings, cleaning is even simpler: wipe with a damp cloth, dry immediately, and almost no maintenance is needed.
Planning Your Installation: Timeline and Next Steps
Once you’ve measured, understood the regulations, chosen materials, and planned your anchoring strategy, you’re ready to install.
Timelines vary: simple railings on existing stairs take a day or two, while complex custom fabrication takes longer.
Before installation, confirm your design meets UK Building Regulations, have your measurements reviewed by a professional, and check your material choices suit your basement conditions.
The most important step is accurate measurement and planning. Everything else follows from getting this right. Rushing this phase leads to costly mistakes later.
When you’re ready to move forward, contact us for a free site survey. We’ll measure your basement stairs, assess your structure, and discuss your design preferences, then fabricate your custom metal railings and handle the installation.
Frequently Asked Questions
What measurements do I need to take before planning metal railings around basement steps?
Start by measuring the total run (horizontal distance) and rise (vertical height) of your staircase. Record the width of each tread and height of each riser. Measure from the top and bottom landings to determine if your stairs are straight or turning. Note the wall-to-wall width and any obstacles like pipes or electrical conduits. These dimensions form the basis for your railing design and ensure your fabricator creates railings that fit precisely.
What are the UK Building Regulations requirements for basement stair handrails?
UK Building Regulations require handrails on stairs with three or more rises. Handrails must be between 900 mm and 1000 mm above the stair nosing and positioned so the inner edge is at least 50 mm from the wall. Balusters must be spaced no more than 100 mm apart (the 100 mm sphere rule prevents small objects passing through). Your railing must withstand a horizontal force of 1.2 kN per metre and vertical force of 0.36 kN per metre. Always verify these requirements apply to your specific installation, as regulations can vary by application.
Which metal is best for basement stair railings?
Stainless steel and galvanised mild steel are the most durable options for basements. Stainless steel resists corrosion naturally and requires minimal maintenance, making it ideal for damp environments. Galvanised steel offers excellent protection through a zinc coating and is more cost-effective while still providing long-lasting durability. Wrought iron can be used if properly finished with powder coating and regular maintenance. Consider your basement’s moisture level and ventilation when choosing; poorly ventilated basements benefit most from stainless steel or heavily galvanised finishes.
How do I protect basement railings from damp and corrosion?
Specify galvanised or stainless steel materials during planning to provide inherent corrosion resistance. Powder coating adds an extra protective layer and improves aesthetics. Ensure adequate basement ventilation to reduce moisture buildup around your railings. Inspect railings twice yearly for any signs of rust or coating damage, particularly at joints and welds where corrosion often starts first. Wipe down railings periodically with a dry cloth to remove condensation. If you notice surface rust on galvanised finishes, it can usually be cleaned with a wire brush and treated with a rust converter.