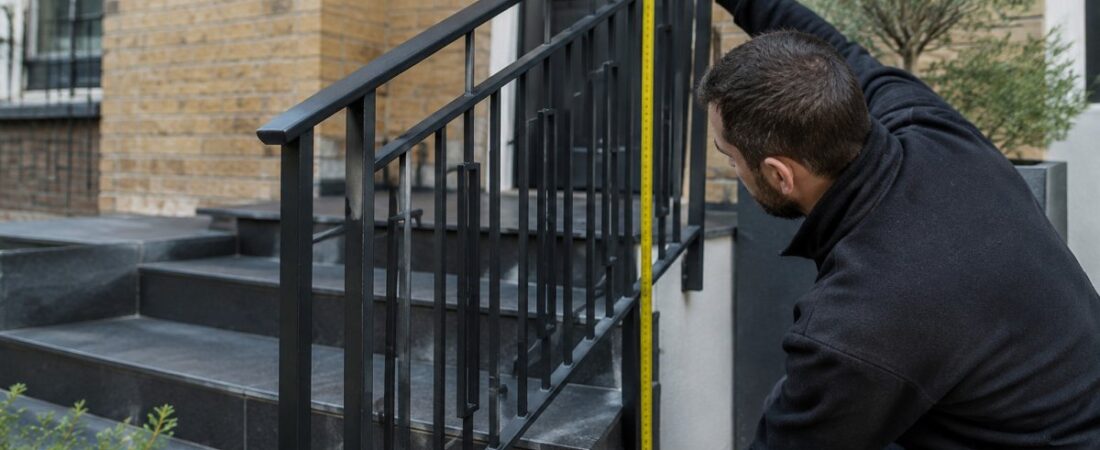
Last Updated: November 5, 2026
Quick Summary
To learn how to measure for custom railings, record every figure in millimetres, sketch the run with labelled reference points, and take the clear opening and mounting-face dimensions at several points. Accurate measurements at the top, middle and bottom of each opening let a fabricator build a railing that fits without guessing.
- Use a steel tape of at least 5 metres and record every figure in millimetres.
- Measure a clear opening from inside face to inside face at the top, middle and bottom.
- Take stair rise and going over several steps and average the figures.
- Record the wall type and whether the railing is surface-mounted or fascia-mounted.
- Send a sketch and photographs with your figures so the fit can be checked.
Table of Contents
- What You Need Before You Measure for Custom Railings
- Step 1: Identify the Railing Area and Reference Points
- Step 2: Measure Straight Runs, Openings and Post Spacing
- Step 3: Measure Railing Height and Stair Angles
- Step 4: Measure a Staircase for a Handrail
- Railing Measurement Checklist and Common Mistakes
- Sending Your Measurements for a Bespoke Quote
- Frequently Asked Questions
Learning how to measure for custom railings sounds simple, but a few millimetres in the wrong place can mean a railing that will not fit, a gate that drags, or a balustrade that looks out of line. Every project is measured before fabrication begins, and the same care applies whether you are a homeowner in a Victorian terrace or a developer working on a new build. This guide walks you through the process step by step, so you can gather accurate figures and send us measurements we can work from.
Start by thinking of the railing as a fit, not just a length. The railing has to suit the opening, the mounting surface and the way people use the space. Get those three right and the rest follows.
What You Need Before You Measure for Custom Railings
Gather a few basic tools before you start. A steel tape measure of at least 5 metres is essential, along with a spirit level, a pencil or marker, a notepad or a sketch sheet, and a camera or phone for photographs.
When you learn how to measure for custom railings, record every figure in millimetres. Working in one unit avoids the mistakes that creep in when feet and metres get mixed up.
Before you measure, check these points:
- Confirm the mounting surface: brick, stone, render, timber or concrete
- Note whether the railing will be fixed to a wall, a floor, a step or a face
- Decide on the finish you want, such as galvanised, powder-coated or stainless steel
- Check whether the space is affected by planning or listed-building rules
Clear the area if you can. A cluttered step or a parked bin makes it harder to take a straight, accurate reading.
Step 1: Identify the Railing Area and Reference Points
Walk the full length of the run and mark where the railing will start and finish. If your railing sits near steps down to a basement, you will find guidance on planning metal railings around basement steps useful before you begin. These are your reference points. Common ones include a wall corner, a newel post, a gatepost or the edge of a step.
Mark each reference point with a small pencil dot on the surface, or tape a strip of masking tape as a guide. Label them on your sketch with letters, such as A for the start and B for the finish.
Next, sketch the area in a simple plan view. Draw the wall, the step or the opening as straight lines, and add your reference points. A rough sketch with clear labels is often more useful to us than a set of numbers alone.
Keep the sketch simple. You only need the shape of the run, the points you measured from and the direction of any turns.
Step 2: Measure Straight Runs, Openings and Post Spacing
Straight runs are the easiest part to measure, but accuracy still matters. Measure from one reference point to the other along the top edge of the surface, then take a second reading along the bottom edge if the ground or step is uneven.
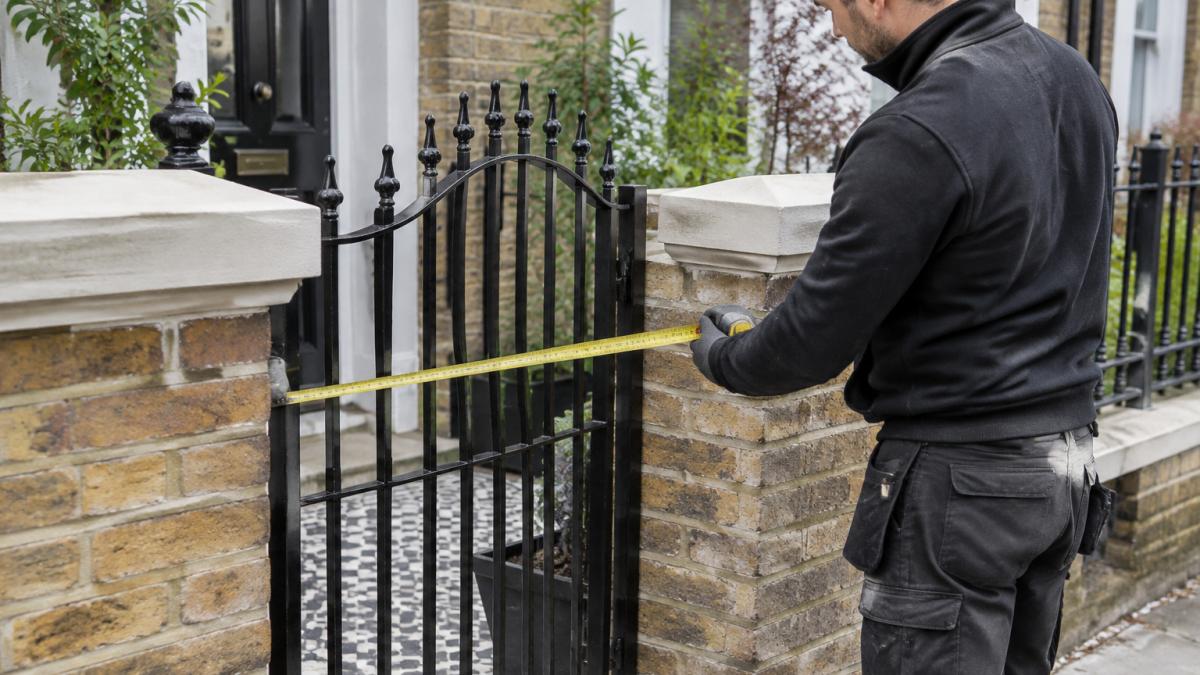
For an opening, such as a gate or a gap between two piers, measure the clear width from inside face to inside face. Take that reading at the top, middle and bottom of the opening. If the readings differ by more than a few millimetres, note it, because the wall or pier may not be square.
Post spacing affects how the railing is built and how strong it feels. Mark where you would like each upright to sit, then measure the distance between centres.
Mounting method changes the dimensions you need to capture. For a surface-mounted railing fixed to the top of a wall, step or floor, measure the available flat width of that surface and note any upstand, coping stone or render that projects.
Watch out: measure the opening twice, at more than one height, before you order.
The article sets out what to record for each type of measurement, so this table summarises the key figures and checks in one place.
| Measurement | What to record | Why it matters |
|---|---|---|
| Straight run | Start to finish, top and bottom edges | Shows the run length and any unevenness |
| Opening width | Inside face to inside face, top, middle and bottom | Reveals whether the opening is square |
| Post spacing | Distance between centres | Affects build and strength |
| Mounting surface | Flat width or clear face height and projection | Determines bracket and fixing fit |
| Stair pitch | Rise and going, averaged over several steps | Sets the handrail angle and length |
| Railing height | From finished floor or step, several points | Captures slopes and level changes |
Step 3: Measure Railing Height and Stair Angles
Railing height is measured from a fixed point, usually the finished floor or the top of the step, up to the top rail. Take this reading at several points along the run, especially if the floor slopes.
Stairs need extra care. Measure the pitch of the staircase by taking the rise (the height of each step) and the going (the depth of each tread). Measure several steps and average the figures, because older stairs often vary slightly from one step to the next.
Angles matter for any sloped section. Place a spirit level along the stair nosings, then measure the angle or the vertical drop over a set horizontal distance. Write both figures on your sketch. For most projects, a simple rise and going measurement gives us what we need to calculate the angle precisely.
Step 4: Measure a Staircase for a Handrail
A handrail needs to run smoothly along the full length of the stairs and sit at a comfortable height for the hand. If you are wondering whether an outdoor handrail can be fitted to your stairs, check that before you measure. Measure from the nosing of the bottom step to the nosing of the top step, along the line of the stairs.
Record the rise and going of each step, as described above, and note whether the staircase is straight, curved or has a landing. Landings and turns change how the handrail joins at the top and bottom.
Also check the wall. Measure how far the wall projects from the stair line, and mark where any brackets will fix. Mounting points need solid masonry or a suitable fixing, so note the wall type on your sketch.
The handrail length, bracket positions and any bends needed to follow the stair line can then be calculated from these measurements.
Railing Measurement Checklist and Common Mistakes
Use this checklist before you send your figures. It doubles as a measurement worksheet: copy it onto a sheet, add your sketch, and tick each line as you go.
- Overall run length from start point to finish point, in millimetres
- Clear opening width at top, middle and bottom
- Railing height from the finished floor or step, taken at several points
- Post spacing or your preferred post positions, with obstructions noted
- Stair rise, going and the number of steps
- Wall type and mounting surface (brick, stone, render, timber or concrete)
- Mounting method: surface-mounted or fascia-mounted, with the relevant face dimensions
- Any corners, angles, curves or landings marked on the sketch
- Photographs of the area from two or three angles, including any damage or uneven surfaces
- Finish you would like, such as galvanised or powder-coated
Tolerances and uneven surfaces deserve their own check. Older properties in Victorian and Edwardian terraces rarely have square openings or level floors, and modern developments can have inconsistent wall spacing. Where a surface is out of square or a floor slopes, take multiple readings across the run and record the smallest and largest figures rather than a single average.
Common mistakes to avoid:
- Mixing units. Stick to millimetres throughout.
- Measuring one point only. Walls and floors are rarely perfectly square or level, so take several readings and record the range.
- Confusing opening size with finished railing size. Give us the clear opening and the mounting method; the railing is made to fit with allowances for brackets, fixings and clearance. Do not send a guessed railing size.
- Forgetting the wall projection. Brackets and fixings need space, and a wall that bulges can throw the fit out.
- Ignoring the mounting face. A surface-mounted railing needs the flat width of the top surface; a fascia-mounted railing needs the clear height and projection of the vertical face. Mixing the two leads to brackets that will not sit flush.
- Skipping the photographs. A photo shows details, such as a damaged coping stone or an obstruction, that a tape measure will not.
Before you send anything, run a final verification pass. Re-measure the overall run and the clear opening once more, compare them against your first readings, and check that every figure on your sketch is in millimetres. Confirm that your sketch shows which dimension is the opening and which is the intended railing line. If anything differs by more than a few millimetres, note it rather than choosing one figure.
Sending Your Measurements for a Bespoke Quote
Once your measurements are ready, send us your sketch, your figures and a few photographs. You can start with our bespoke metal gates and railings service, which covers the designs and finishes we can build to your measurements. The more detail you provide, the faster we can check the fit and prepare a bespoke quote. You can start with our bespoke metal gates and railings service, which covers the designs and finishes we can build to your measurements.
Pricing depends on several factors, including the length and height of the run, the complexity of any angles or curves, the finish you choose and how the railing will be installed. For current prices, request a quote from Metal Railings London.
When you are ready, get a free quote today. We will review your measurements and arrange a site survey if needed. Measuring carefully now helps you get a railing that fits the way it should.
Frequently Asked Questions
How do you measure for custom railings?
Start by measuring the opening from one fixing point to the other, both at the top and bottom, and record the height from the finished floor or ground level to the top of the rail. Measure each straight section end to end, note any corners or angles, and mark the position of posts or pillars. Take readings in millimetres and sketch the layout with a photo, so the fabricator can check the fit before manufacture. Pricing depends on quantity and finish, so request a bespoke quote once your measurements are ready.
How do you measure a staircase for a handrail?
Measure the stair pitch with an angle finder or a level and a straight edge, then measure the total length of the handrail run along the stair nosing line. Record the height of the handrail at the bottom and top of the flight, and note where the rail will meet a landing or newel post. Measure wall-to-wall at each fixing point so the brackets can be positioned accurately. Send photographs of both ends of the flight with your measurements.
How much clearance should there be between railing bars?
The required clearance depends on the application and the rules that apply to it, so check the current requirements under the Building Regulations and any relevant British Standards before fixing the spacing. Your fabricator can advise on bar spacing for your property and confirm the final layout before manufacture. Note any specific spacing you want, such as a decorative pattern, when you send your measurements.
Can a railing installer check the measurements on site?
Yes. A site survey lets a fabricator check opening widths, wall condition, levels and fixing surfaces before manufacture begins. This is particularly useful for uneven ground, sloping boundaries and older buildings where walls are not square. Book a free site survey with Metal Railings London so your measurements are verified and your bespoke quote reflects the actual site conditions.
